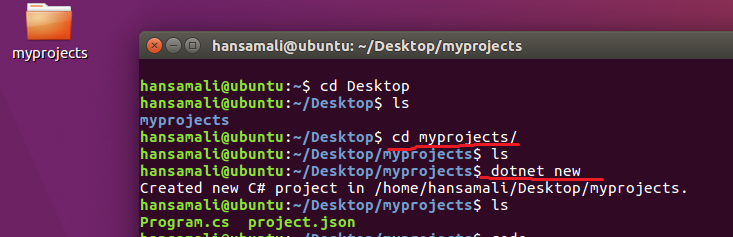
Let’s try to create a .NETCore application from Visual Studio 2015
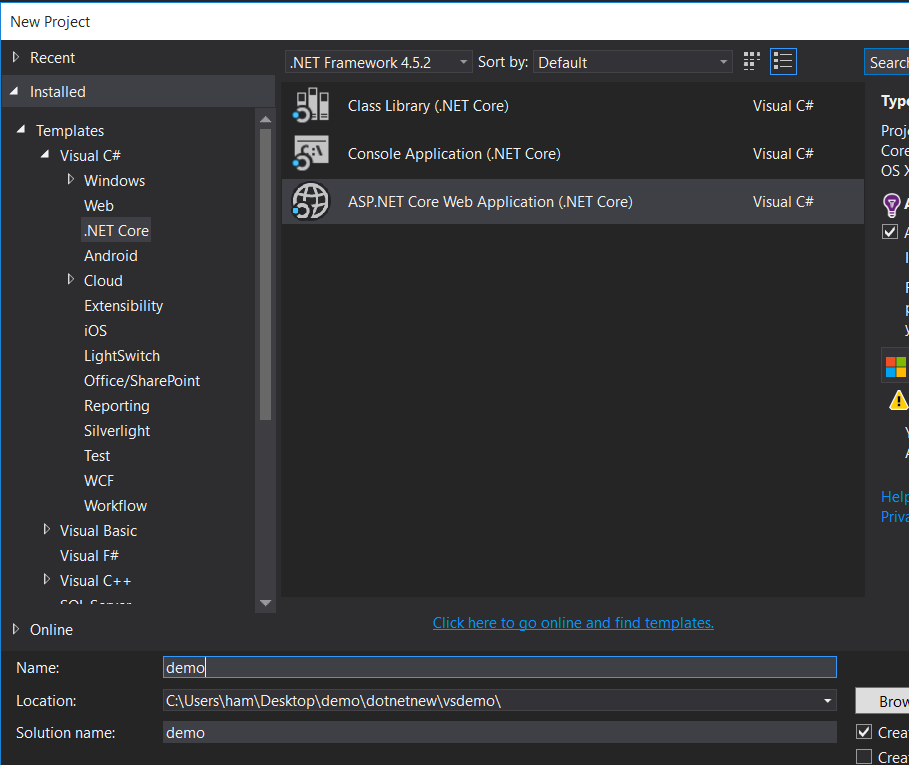
Create a new project from Visual Studio 2015, In .NETCore tab, select ASP.NET Core Web Application (.NET Core) . Give it a name and click on OK.
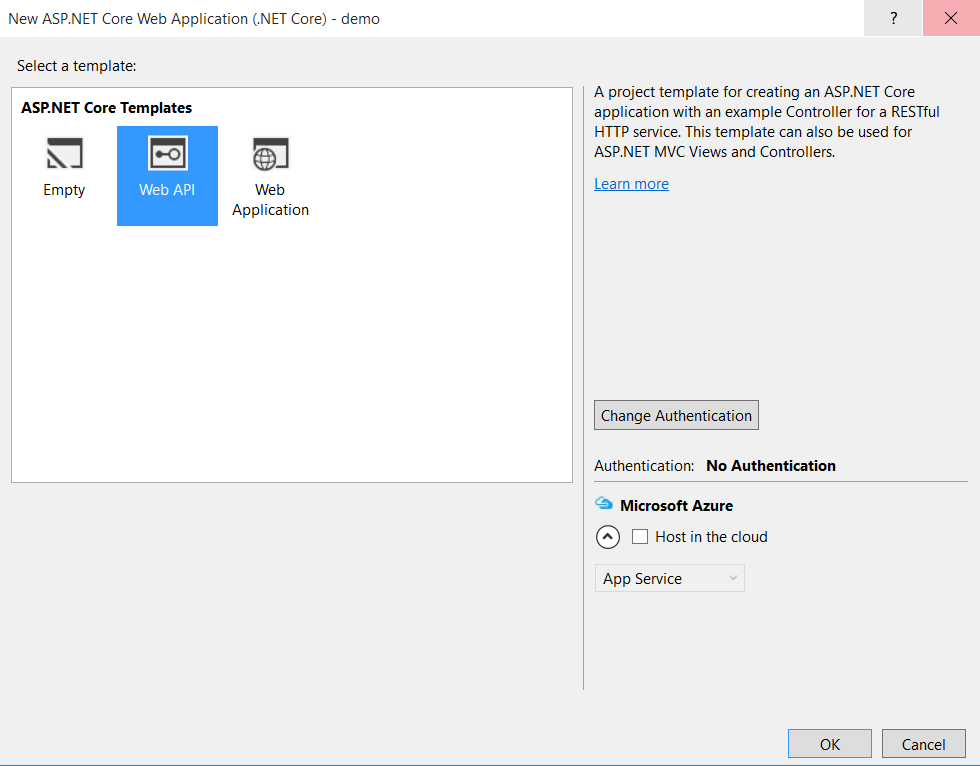
Select Web API from ASP.NET Core templates and click on OK.
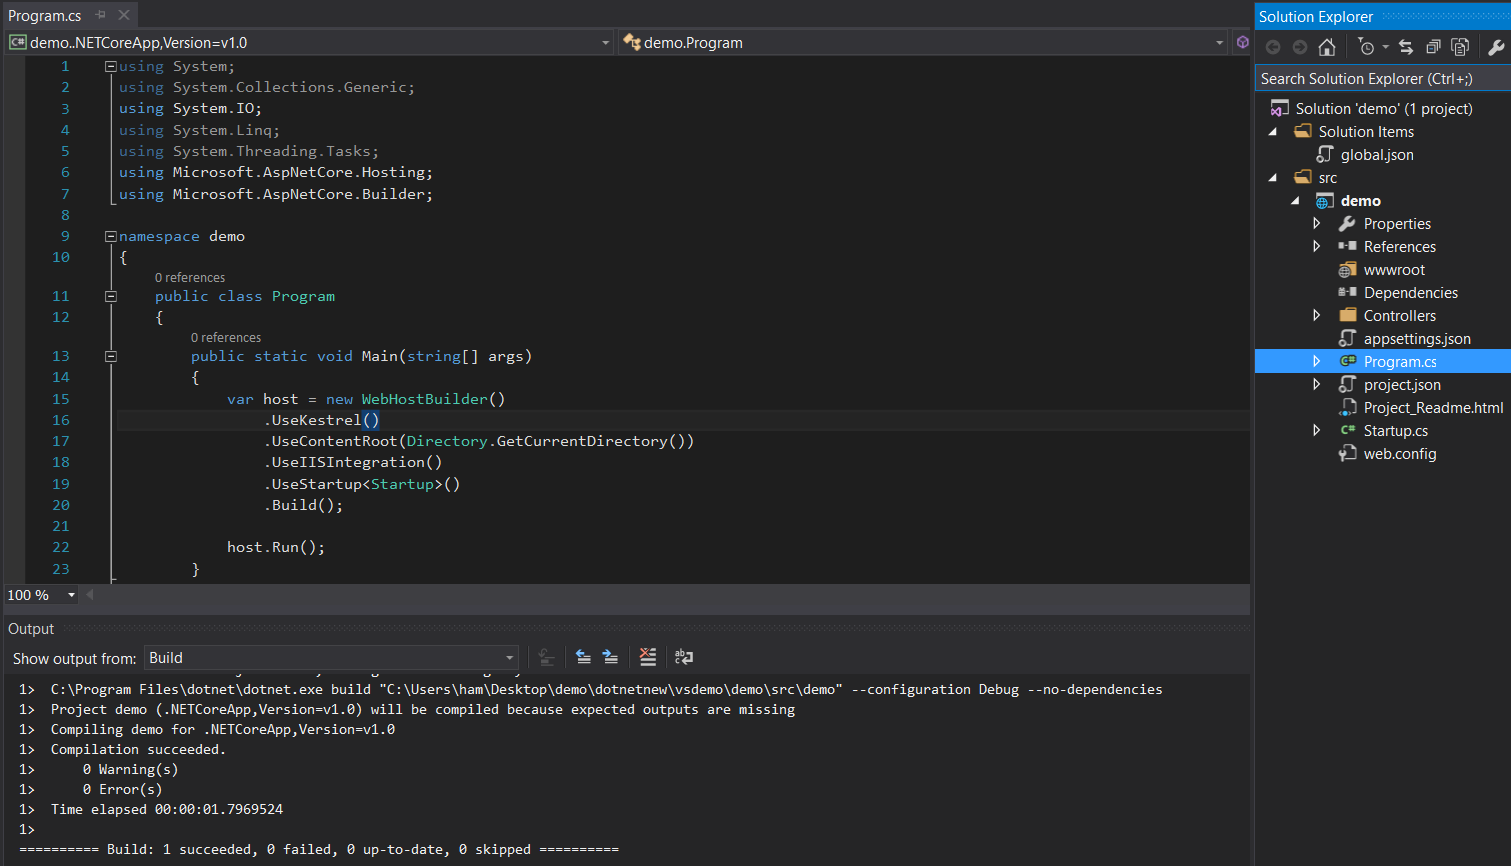
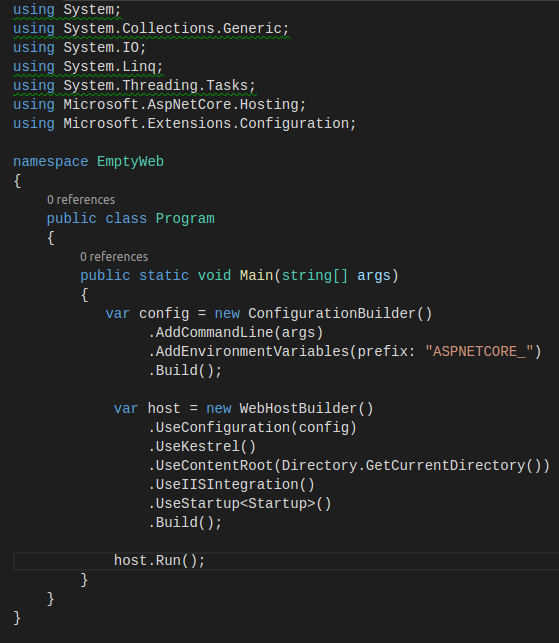
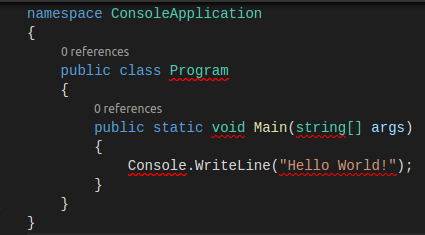
Check folder structure of the application, It includes a Program.cs and Startup file. It includes a project.json file to define all required packages for your application. appsettings.json file maintains application settings same as web.config file in a ASP.NET Web application. Controllers folder has all Web API Controllers.
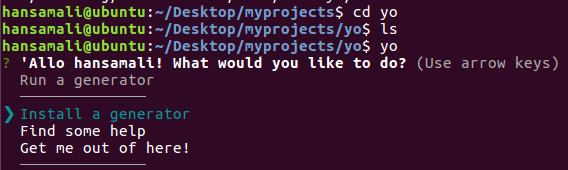
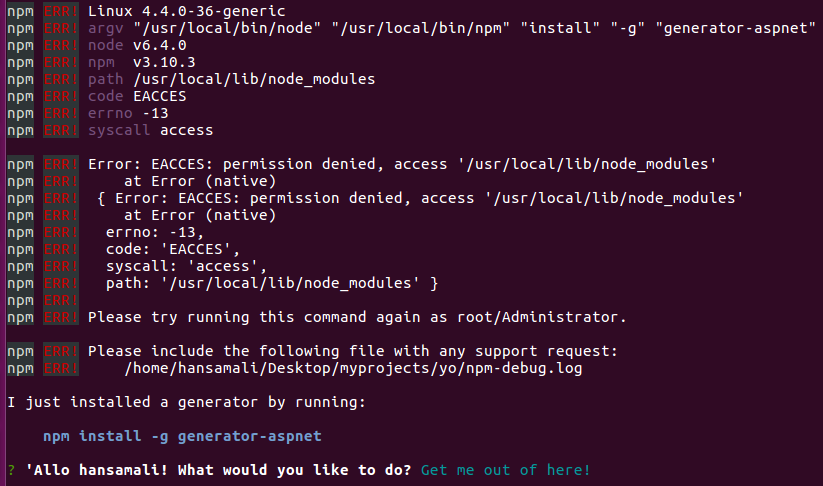
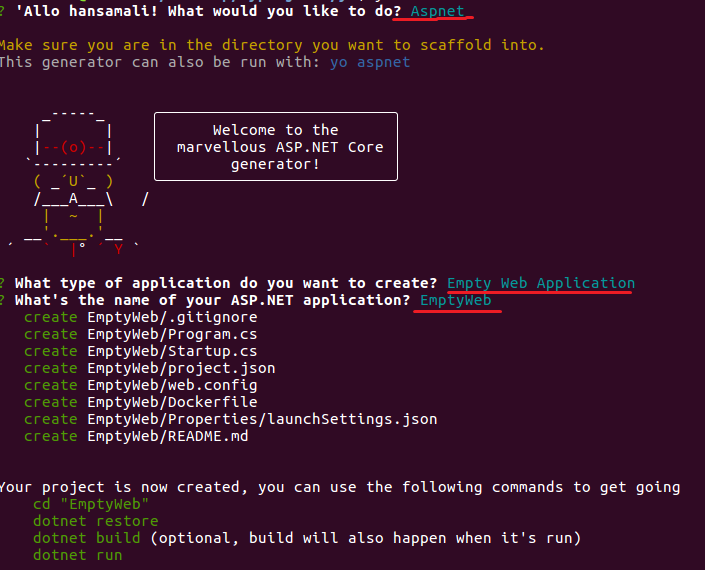
If you want to create a Web API application from Yeoman template generator, follow this post, http://hansamaligamage.github.io/2016/09/16/Create-a-web-application-with-Yeoman/
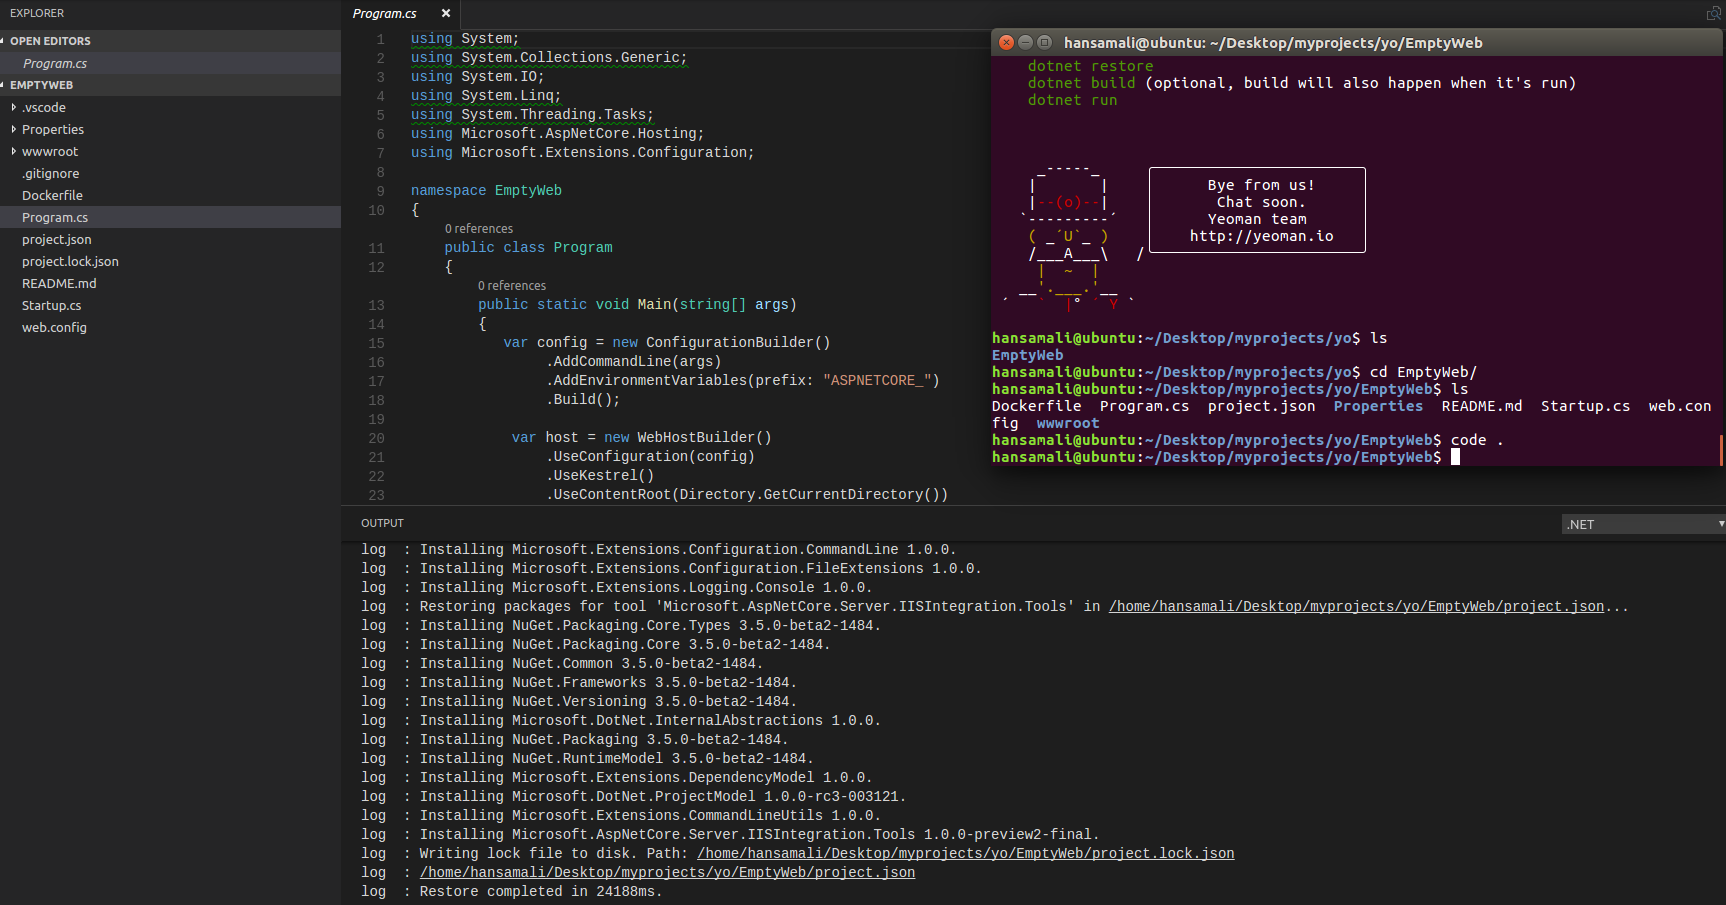
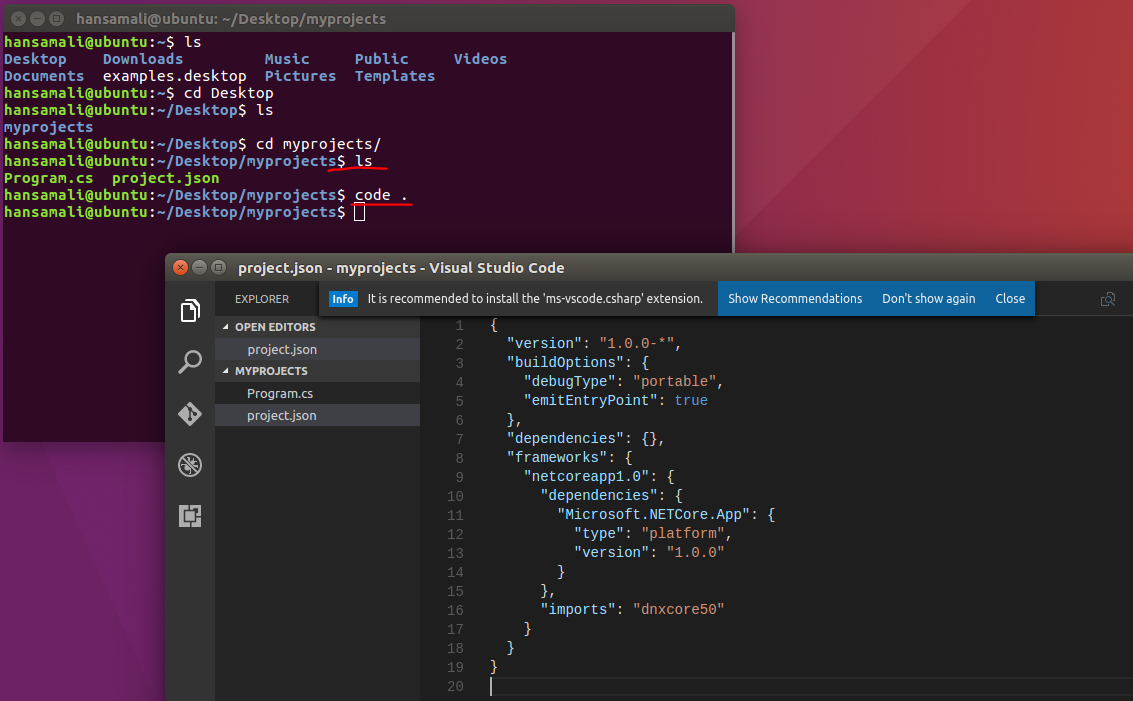
Open service application from Visual Studio Code.
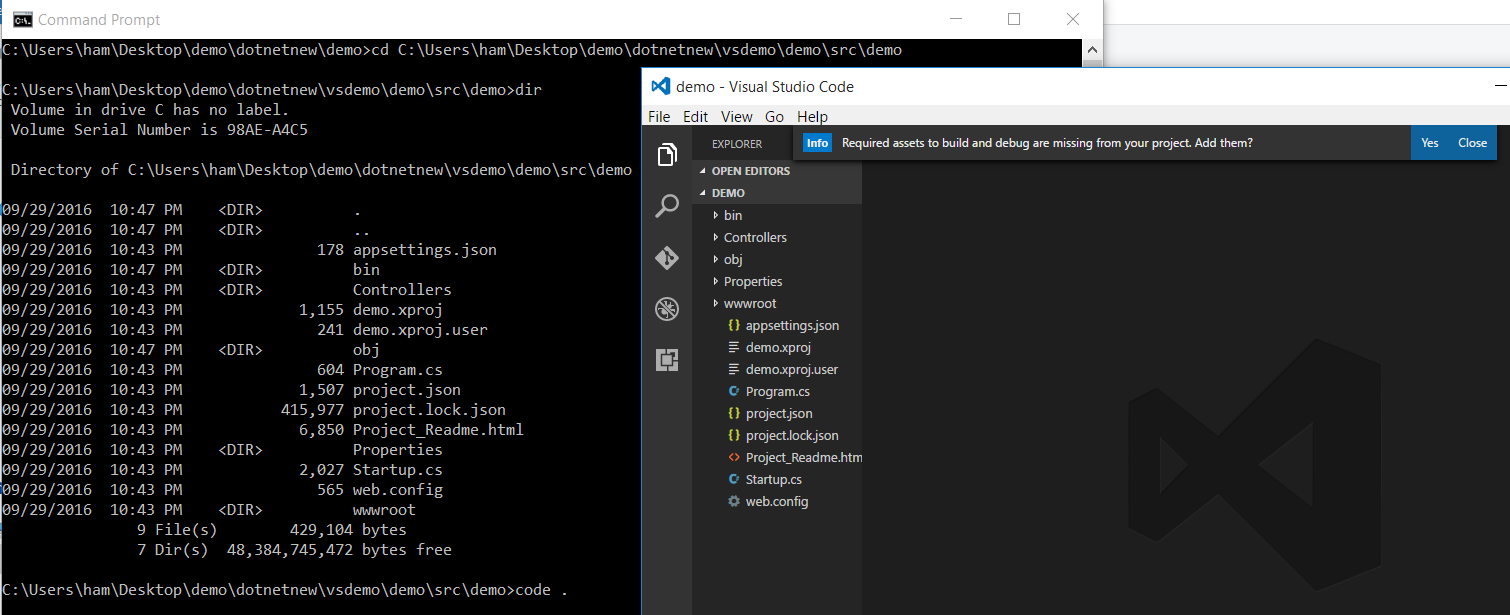
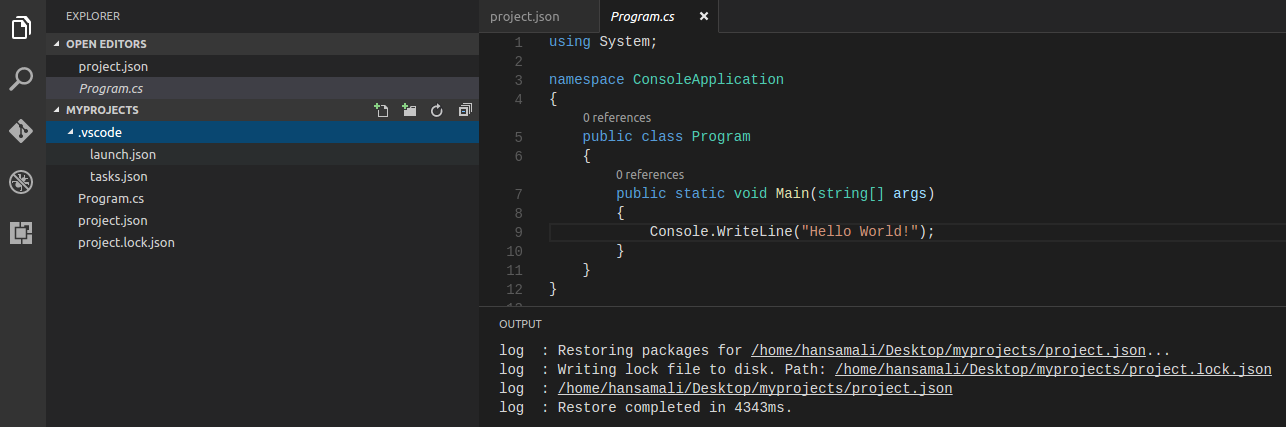
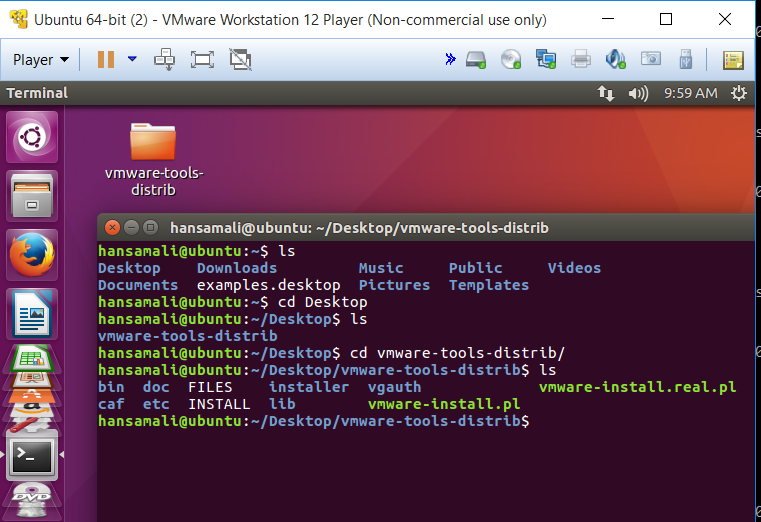
cd into the application directory and open Visual Studio Code using code . command. You can see folder structure of your application as above. Add assets to build and debug your application as the info dialog box suggests.
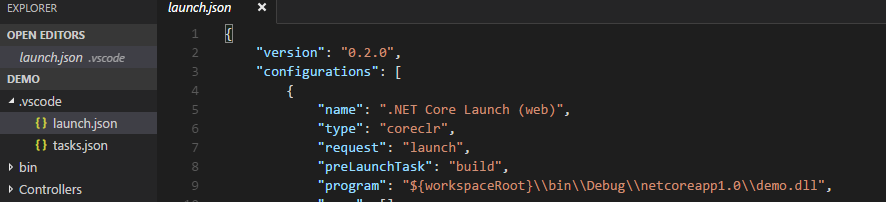
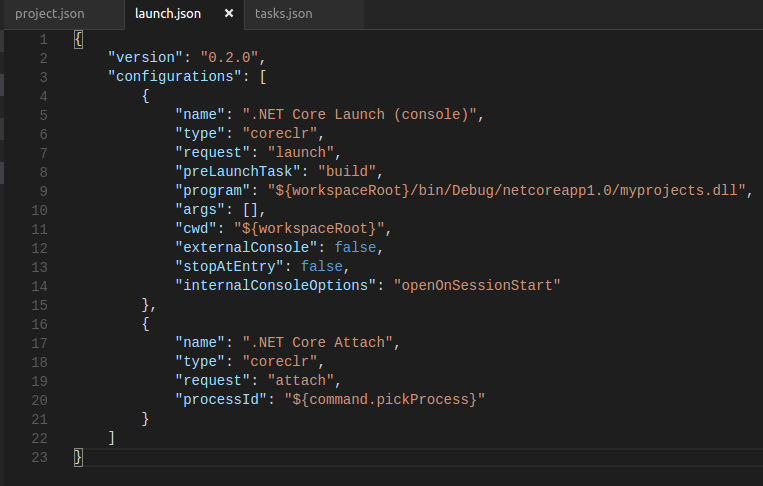
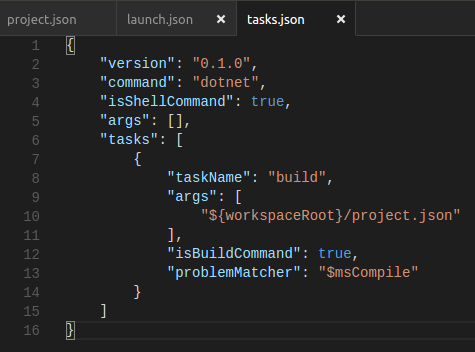
vscode folder is added into the solution with launch.json and tasks.json file.
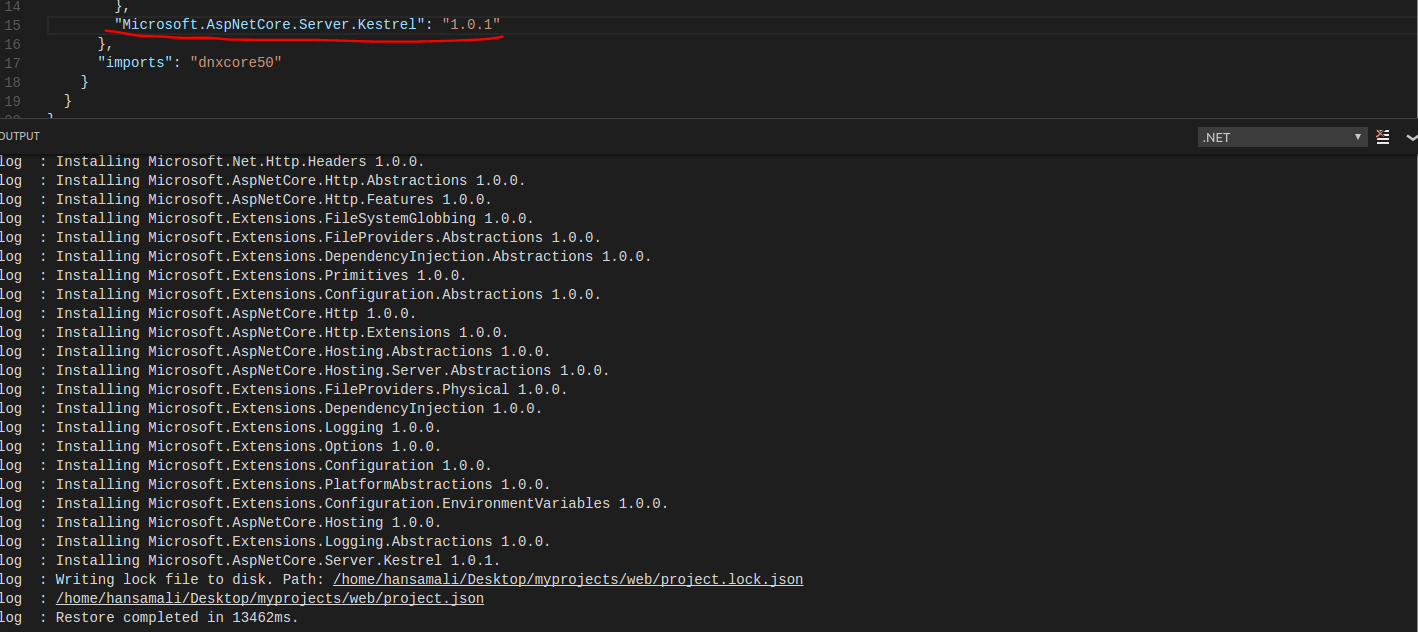
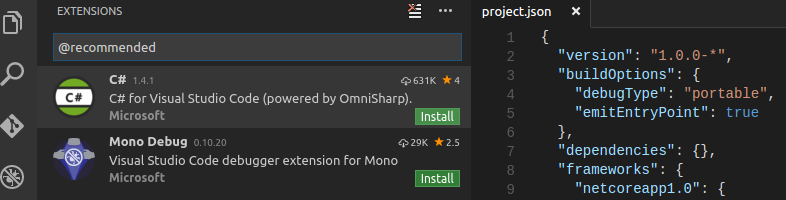
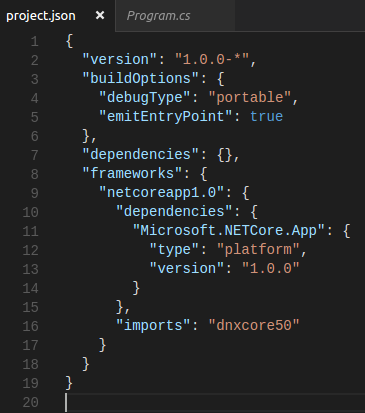
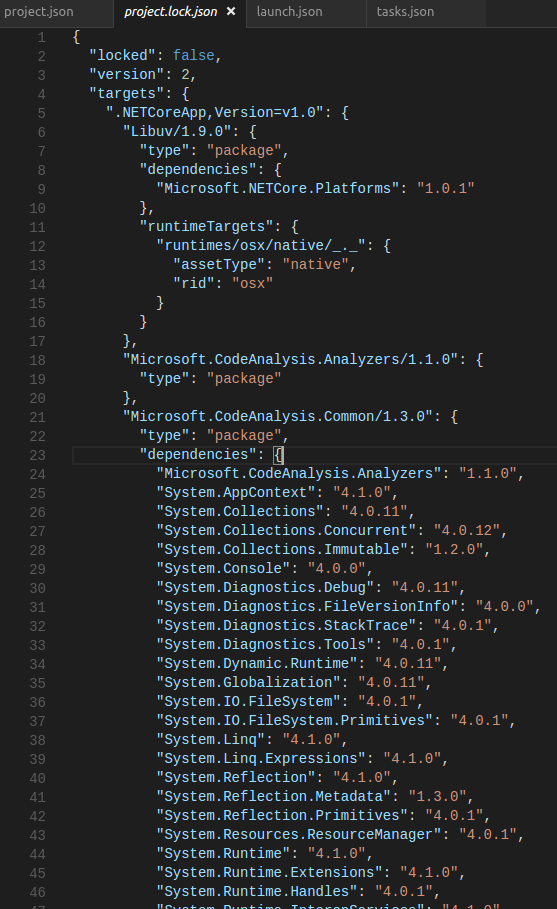
Dependencies in project.json file
Let’s see what are the dependencies required for a mvc application.
To find out more about project.json file and launch.json file, You can check this post, http://hansamaligamage.github.io/2016/09/15/Hello-World-in-NETCore-Ubuntu/
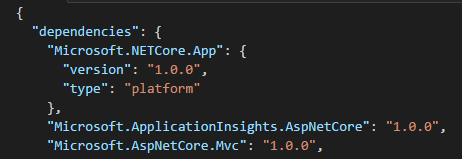
Since We create a Web API application, in project.json file, It shows Microsoft.AspNetCore.Mvc package dependency.
Run ValuesController and check service calls.
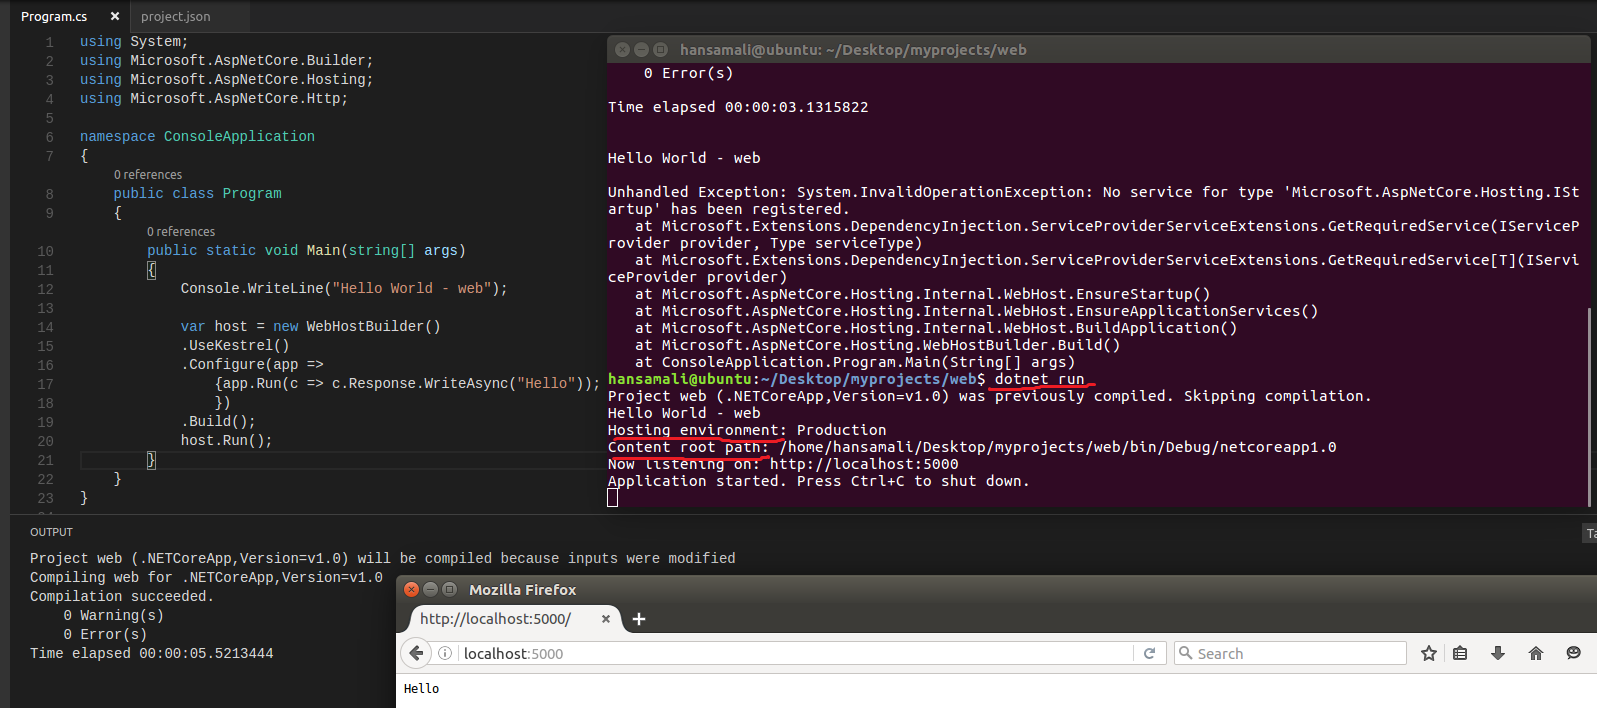
If you want to check how a web application is going to run, check this post, http://hansamaligamage.github.io/2016/09/15/Web-Application-in-NETCore-Ubuntu/
Let’s run Web API application and check available services.
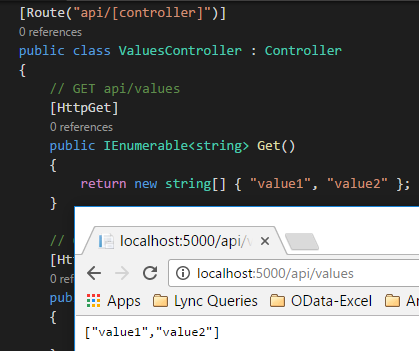
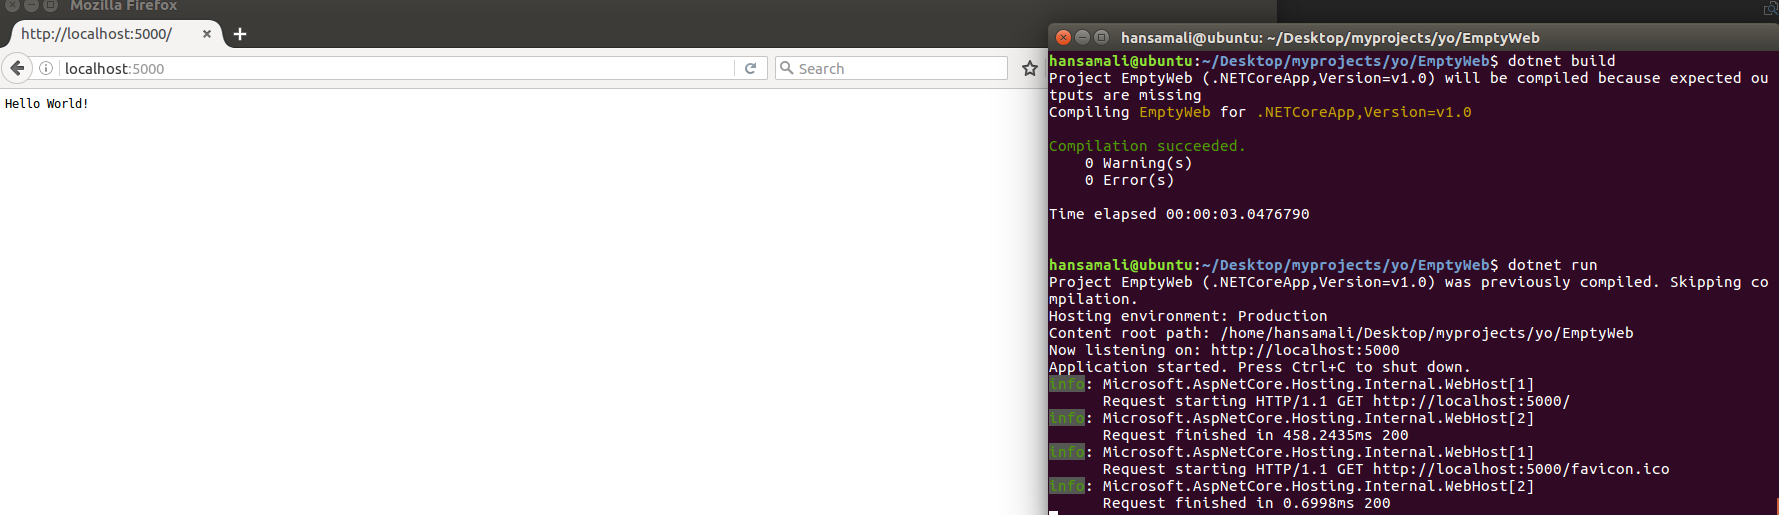
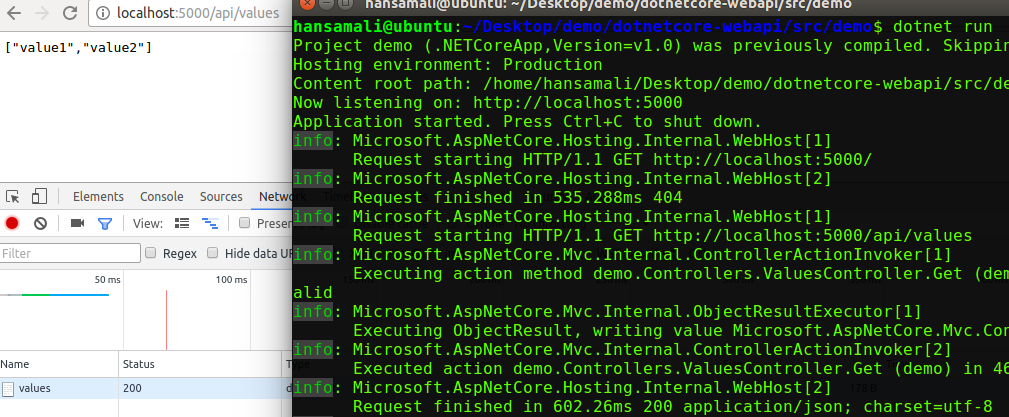
Build (Ctrl + Shift + b) and run (Ctrl + F5) your application and ping to the Read service as above. Its shows return values in the browser.
Let’s build the movie service
Create Movie model.
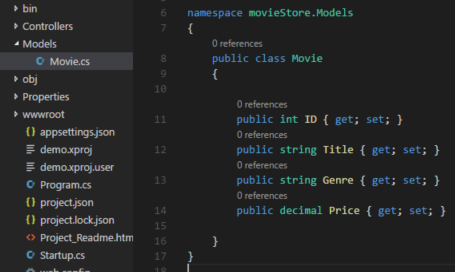
Create a Model folder to define entities in your application. Then create Movie class and add properties into it. We follow Code First approach in this example. So when we create the database Movie table will be created.
Create Context class to build the database.

public class MovieDbContext : DbContext
{
}
From context class, our database will be generated. Context class should be inherited from DbContext class. In order to do that, we have to add references from Entityframework core.
Install Entityframework Core (EF Core)

Add entityframeworkcore reference as a dependency into project.json file, “Microsoft.EntityFrameworkCore”: “1.0.0” and resolve reference error in MovieDbContext class by adding using Microsoft.EntityFrameworkCore statement.
Define the connectionstring

Define the connectionstring in appsettings.json file to connect to the Sql server, “ConnectionStrings”: { “DefaultConnection”: “Data Source=localhost;Initial Catalog=movieDB;Integrated Security=true” }
Check MovieDbContext class

In MovieDbContext class, define constructor with context options and call base class method.
Add entities in moviecontext class

Try to run migrations for MovieDbContext class, dotnet ef migrations add InitialMigration It gives an error. No executable found matching command “dotnet-ef” , We have to install entityframeworkcore tools to run migrations from .NET cli. Let’s try to do that.
Add EFCore tools

Add “Microsoft.EntityframeworkCore.Tools” : “1.0.0-preview2-final” in tools section of project.json. Try to run migration and it gives an error again!!, Could not invoke this command with the startup project ‘demo’. Check that ‘Microsoft.EntityFrameworkCore.Design’ has been added to “dependencies” in the startup project and that the version of ‘Microsoft.EntityFrameworkCore.Tools’ in “tools” and ‘Microsoft.EntityFrameworkCore.Design’ are the same. See http://go.microsoft.com/fwlink/?LinkId=798221 for more details, What’s we are missing,
We haven’t added ‘Microsoft.EntityFrameworkCore.Design’ as a reference, We have to add EFCore Design references to run migrations scripts. Let’s add it and check. And also it mentions ‘Microsoft.EntityFrameworkCore.Design’ and ‘Microsoft.EntityFrameworkCore.Tools’ version should be same.
Add EFCore Design reference.

Add “Microsoft.EntityFrameworkCore.Design”: “1.0.0-preview2-final” reference into project.json file. Note that, ‘Microsoft.EntityFrameworkCore.Design’ and ‘Microsoft.EntityFrameworkCore.Tools’ version are same.
Then try to run migrations command again and it gives another error, No parameterless constructor was found on ‘MovieDbContext’. Either add a parameterless constructor to ‘MovieDbContext’ or add an implementation of ‘IDbContextFactory
Startup class implementation

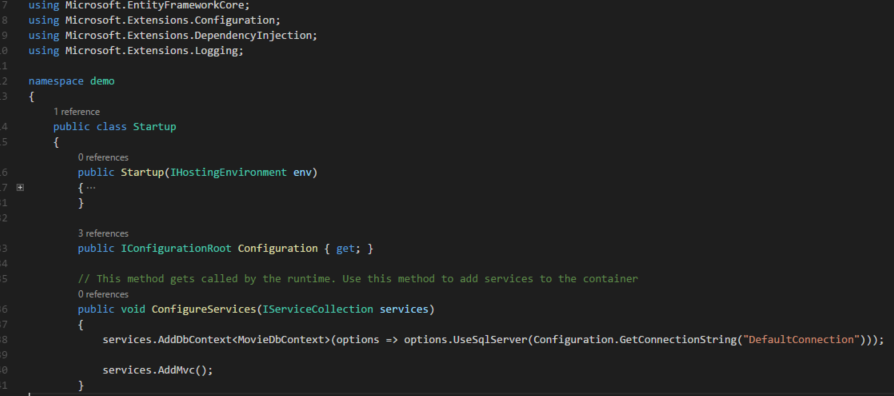
In Configure services method, it’s going to add some services into the application.
services.AddDbContext
options.UseSqlServer(Configuration.GetConnectionString(“DefaultConnection”)));
Add the database context and define the connectionstring of your database, in configure service method, it’s missing some references, since we havent add any EntityframeworkCore sqlserver references.
Add EFCore Sqlserver references

Add “Microsoft.EntityFrameworkCore.SqlServer”: “1.0.0” reference in project.json file and restore them.
Now sqlserver reference is added. Configure service method looks fine.
Run Migrations
Let’s create movieDB in sql serever.
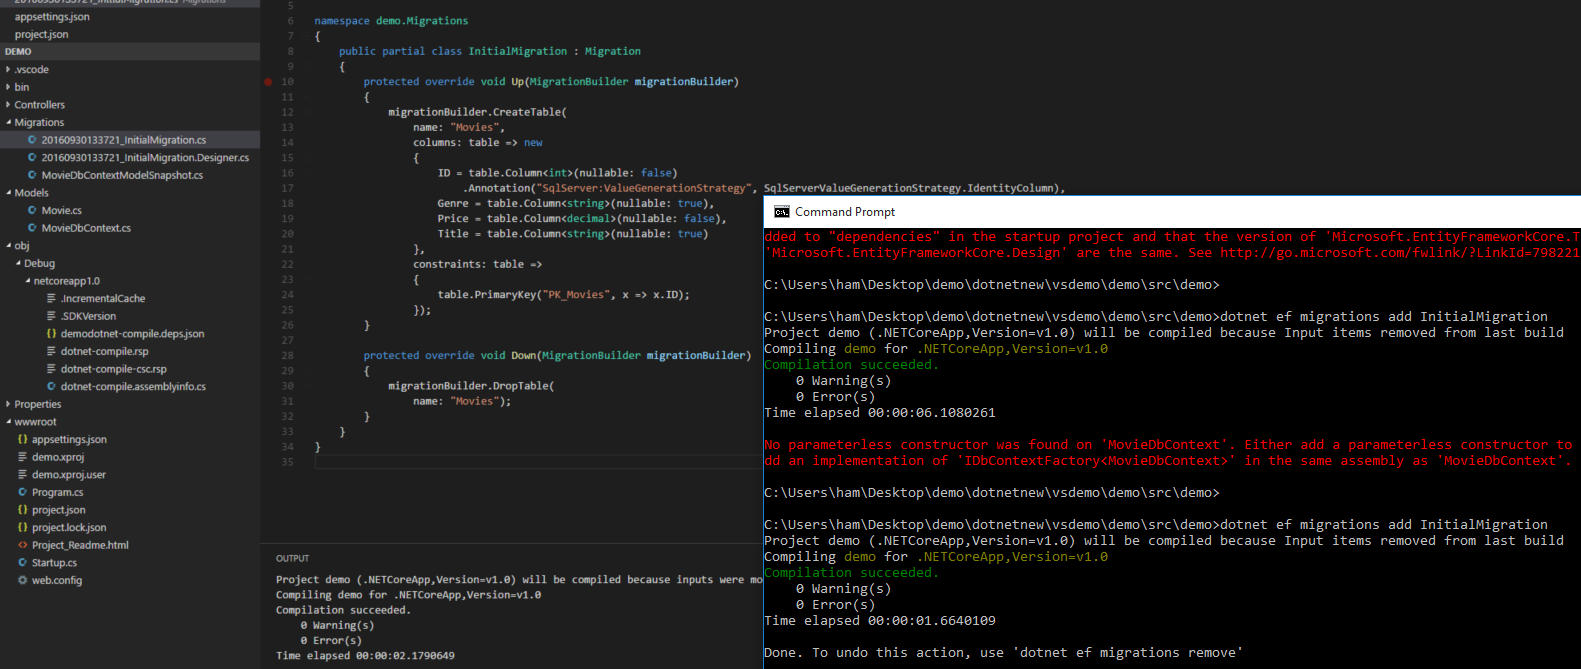
Run Sqlserver migrations, It doesn’t give any errors in .NET cli, Migrations folder is created with migrations scripts. In Initial Migration class, it defines Up and Down methods to create and drop movie table respectively.
Update the database

run dotnet ef database update command to update the database. In sqlserver movieDB got created.
Add Movie controller
In Visual studio code, We can’t use scaffolding. So i created a Movie Controller with all the CRUD operations of Movie entity in visual studio. Let’s add it.
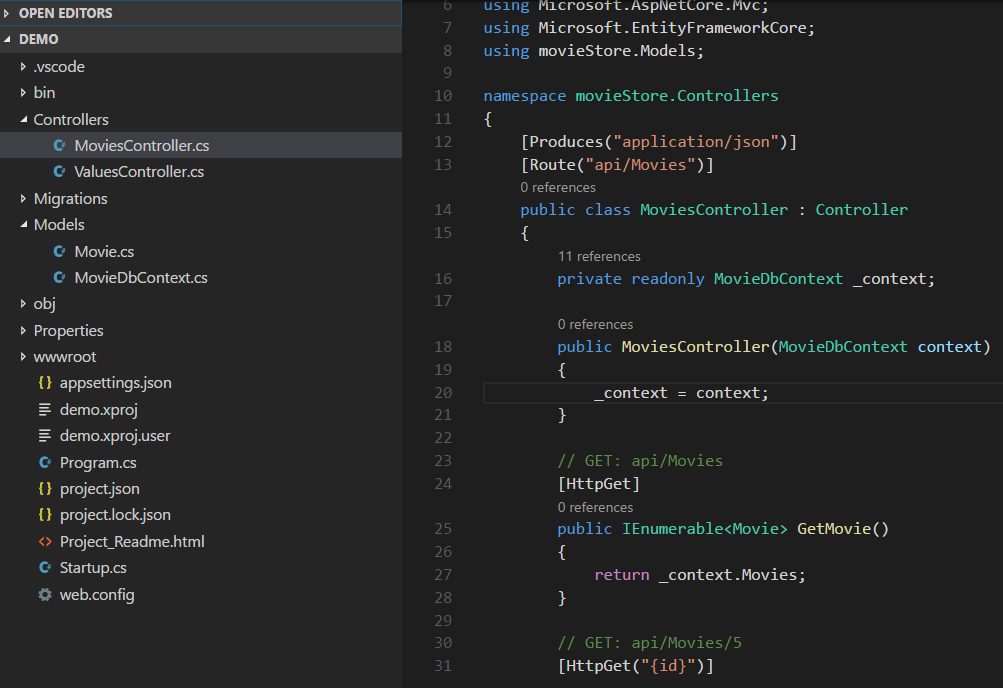
In Movie Controller, it works with application/json type data, and the route is api/Movies. Note that in .NET Core Api controllers inherit from Controller class, not from API Controller class.
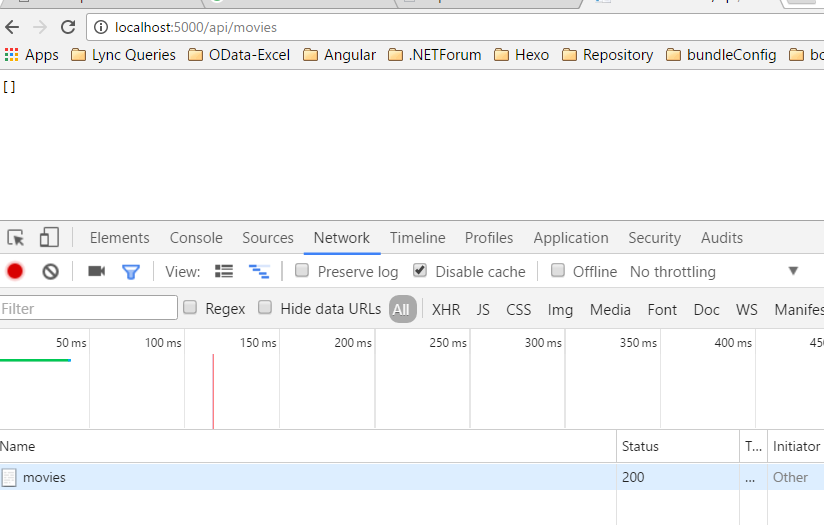
Go to api/movies method and check Network tab in developer tools. method returns 200 - OK. as a response. We don’t have data in movie database, Let’s try to add some data.
Add data using Postman
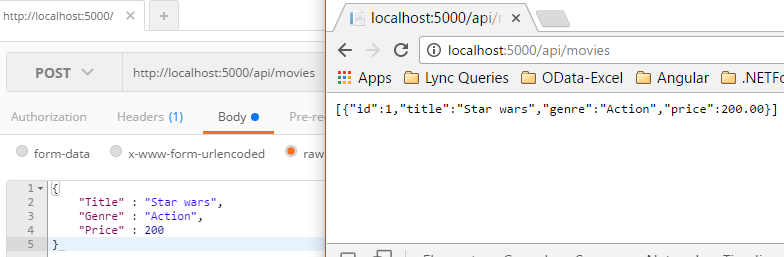
Postman is a tool to test your service apis. Although we can test GET requests through browser, to test POST requests, we need to use Postman. Add a movie using Postman and retrive it using web browser.
We have created a service API using .NETCore and Sql Server. Let’s try to run this same application on Ubuntu with MySQL.
Clone your application in Ubuntu
Let’s try to open your application in Ubuntu, We are going to connect this application to MySQL server,
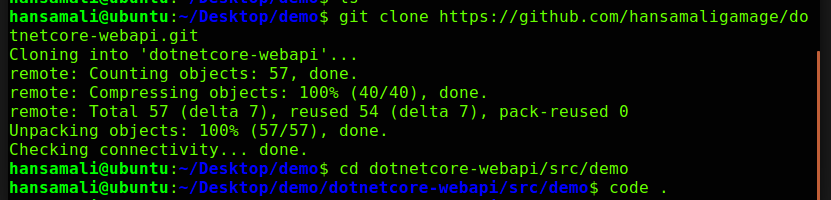
Type git clone … with repository url, Your project will be downloaded. Then cd into application directory and open it in visual studio code.
Restore packages and build your application

Restore packages defined in project.json file and Build your application. It all works fine.
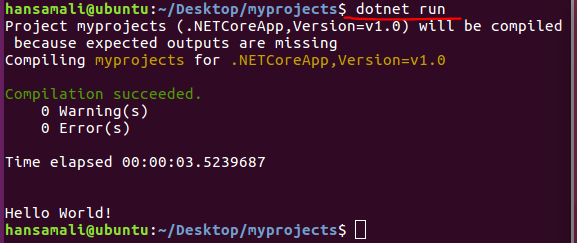
Let’s try to run our application
Let’s try to run our application without any modifications, It seems working fine. Let’s navigate to api/values , It calls READ service of Values service. It returns 200 - OK as response.
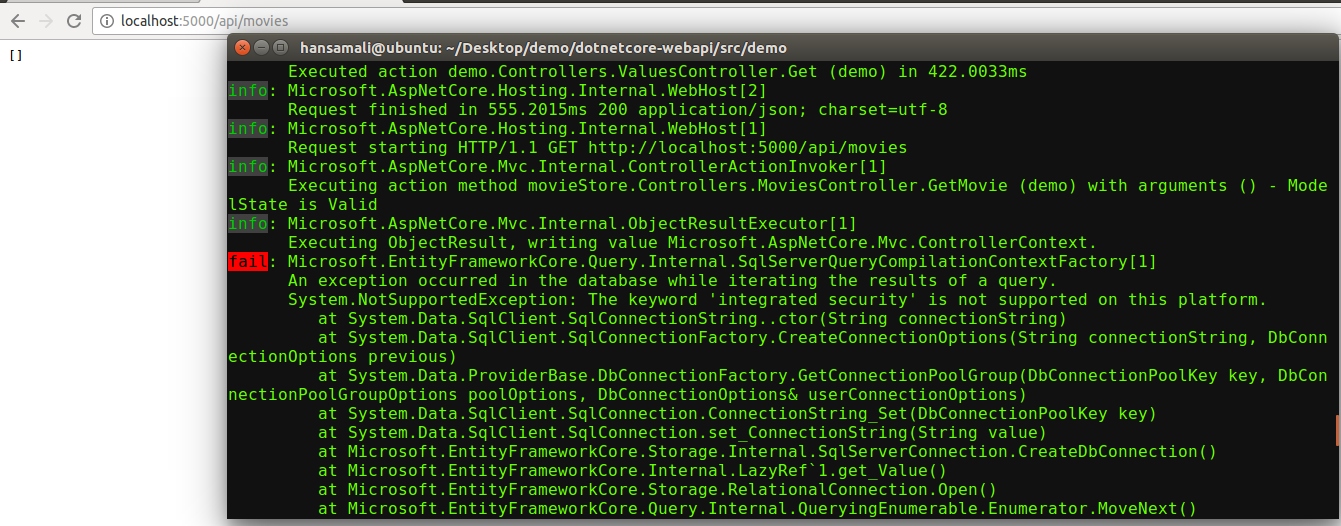
Ping to api/movies, it returns an empty array, since we don’t have a database. Check the terminal and try to find any erros, It shows a fail error in red. It says Microsoft.EntityFrameworkCore.Query.Internal.SqlServerQueryCompilationContextFactory[1]
An exception occurred in the database while iterating the results of a query. System.NotSupportedException: The keyword ‘integrated security’ is not supported on this platform. at System.Data.SqlClient.SqlConnectionString..ctor(String connectionString) …
It says an error as The keyword ‘integrated security’ is not supported on this platform. If you remember, where we have used integrated security , that’s in sql server connectionString. We can’t operate with Sql server on Ubuntu. We have to install My SQL server to store data in your application. Let’s do that.
Add MySQL connectionString

Add mysql connectionString in appsetings.json file, movieDB will get created in mysql server.
“DefaultConnection” : “server=localhost;database=movieDB;uid=root;pwd=hansamali;sslmode=none;”
Add MySQL service in your application
If you remember, we added Sql service into the application when we run in winodows. In Ubuntu also same thing we have to do. Add MySQL service into your application with dbContext class. But it seems we are missing something in here.
Note that, Microsoft.EntityframeworkCore has been highlighted. Your application doesn’t use that reference anymore. It’s a reference from Sql server. We have to add a reference from MySQL to proceed with this. Let’s try to add it.
Add MySQL EFCore reference in project.json file

Add “MySql.Data.EntityFrameworkCore” : “7.0.4-ir-191” reference in project.json file and restore them.
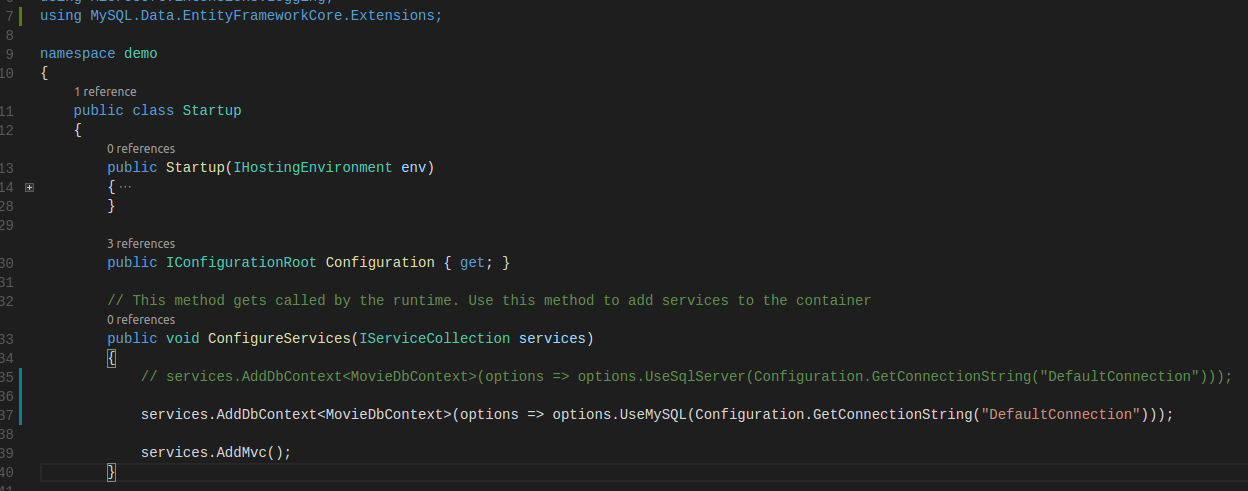
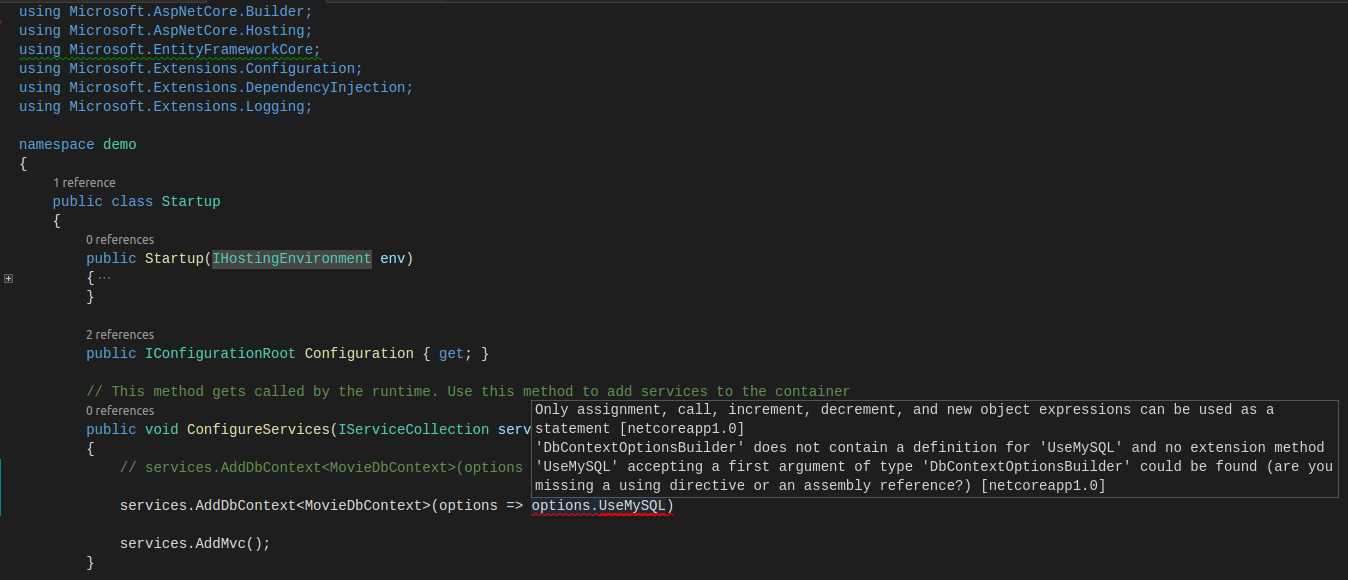
services.AddDbContext
options.UseMySQL(Configuration.GetConnectionString(“DefaultConnection”)));
Add using MySQL.Data.EntityFrameworkCore.Extensions; statement in startup class, It works fine now.
In windows with Sql server, We run migration scripts and ensure database is created. But with Ubuntu, we can’t do that. Somehow we have to ensure our database is created. Let’s give it a try.
Ensure MySQL database got created
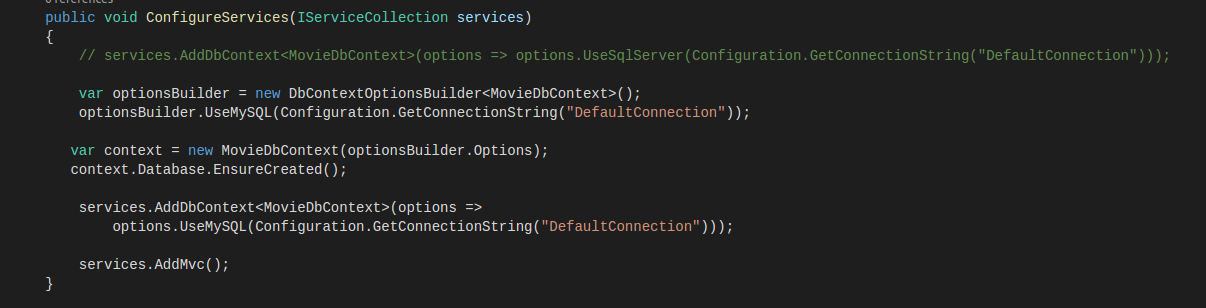
Add this lines of code to ensure MySQL database got created.
var optionsBuilder = new DbContextOptionsBuilder
optionsBuilder.UseMySQL(Configuration.GetConnectionString(“DefaultConnection”));
var context = new MovieDbContext(optionsBuilder.Options);
context.Database.EnsureCreated();
Run your application
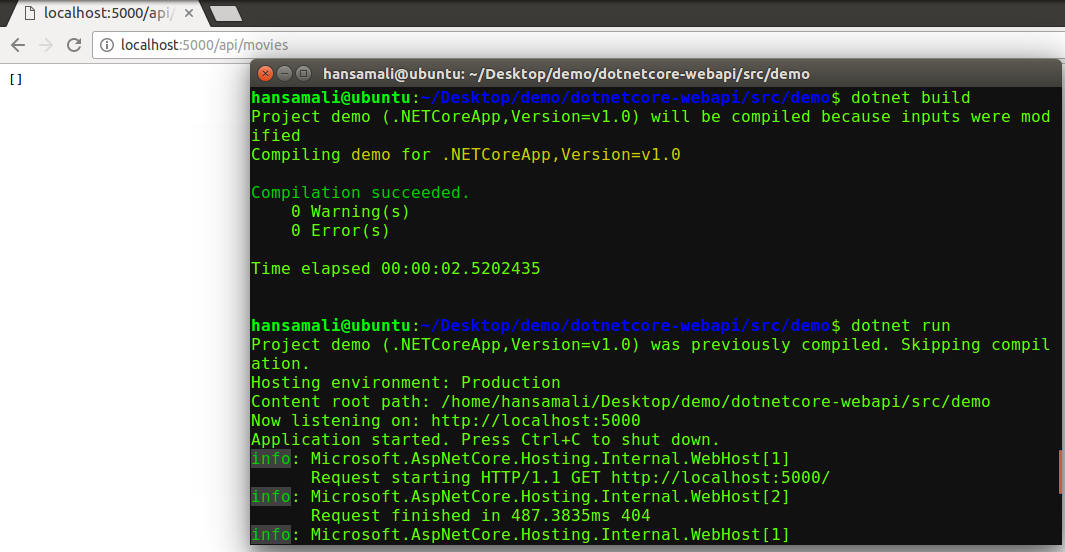
Then build and run the application, navigate to movies read service and verify it works fine. read service returns empty array. Let’s check database is created in MySQL server.
View MySQL databases

run mysql -u root -p command to access mysql shell, then type show databases; to view all the available databases. You can see movieDB. is successfuly created.
Let’s add some data into Movie database in MySQL
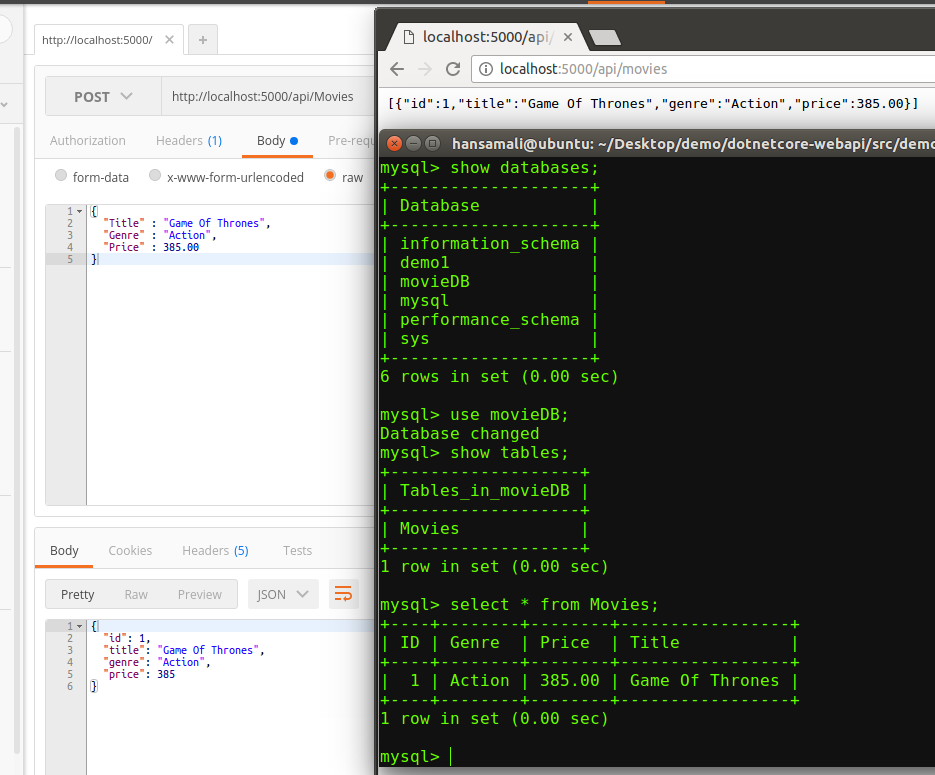
Call POST service in movie controller and add a movie into the mysql database. Refresh read movie service, it shows available movies in your mysql database.
Connect to the mysql shell and try to view data in Movies table.
Go to mysql shell by typing mysql -u root -p , Then type show database; to view available databases, to go inside a database and query it type use movieDB; , You can see available tables in movieDB using show tables; Type a select query to view data as select * from Movies;
In this blog post, I described how to run a web api application in windows with Sqlserver. And then we tried to configure same service application on Ubuntu with MySql server, with less amount of coding we could achieve that.
It was a really cool feature in .NETCore
You can find a sample application from here, https://github.com/immysl/fav-movies